Cinematic videos are not created by expensive cameras. They are created by light.
A camera is just a tool. It captures what is in front of it. If the lighting is flat, the result will look dull. If the lighting has depth, contrast, and mood, the result will look professional even on a basic camera or phone.
Understanding lighting is the turning point for every creator. Once you learn how to control light, your videos will instantly improve. No advanced gear required.
This blog will help you understand lighting in the simplest way possible, so you can start creating cinematic videos right away.
Why Your Videos Look Flat and Unprofessional
Most beginners make one common mistake: They try to light everything evenly.
You turn on all the room lights. You place one light directly in front of the subject. You try to remove every shadow.
And the result; A flat, lifeless video with no depth.
The Problem: Flat Lighting
Flat lighting happens when light hits your subject equally from all sides. This removes shadows, and without shadows, the image loses shape.
Real life is not flat. Faces have curves. Objects have texture. Shadows help our eyes understand depth.
When shadows disappear:
- Faces look unnatural
- Skin looks dull
- The frame feels “cheap”
- Everything blends into the background
The Goal: Create Depth
Professional lighting is not about making things brighter. It is about creating a 3D feel on a 2D screen.
This is done using:
- Light (highlights)
- Shadow (contrast)
- Separation (subject vs background)
Once you understand this, everything changes.
Understanding Cinematic Lighting in Simple Terms
Before using any equipment, you need to understand three basic ideas.
1. Light Direction Matters
Light coming from the front = flat
Light coming from the side = depth
Light coming from behind = separation
2. Shadows Are Important
Shadows are not mistakes. They are what make your subject look real.
Good lighting = controlled shadows, not no shadows.
3. Background Is Part of the Story
A plain, dark, or unlit background makes your subject look disconnected.
Adding light to the background creates mood and depth.
5 Simple Lighting Tools Every Beginner Should Know
You don’t need a complicated setup. These five tools are enough to create professional-looking videos.
1. RGB Lights – Adding Color and Depth
RGB lights allow you to add color to your scene. This instantly makes your video look more cinematic.
Why It Works
A plain background looks boring.
A colored background creates visual interest.
It separates the subject from the background and adds emotion.
How to Use It
- Place the RGB light behind the subject
- Point it at a wall, curtain, or object
- Use colors like:
- Blue → calm, professional
- Orange → warm, emotional
- Purple → creative, modern
Beginner Tip
Do not point RGB lights at the face. It can look unnatural. Always use them for the background.
2. Reflector – The Simplest Lighting Tool
A reflector is just a surface that reflects light. It can be:
- White board
- Foam sheet
- Wall
- Even a piece of paper
Why It Works
Sometimes shadows are too dark. Instead of adding another light, you can bounce existing light.
This keeps the lighting natural.
How to Use It
- Place your main light on one side
- If the opposite side is too dark, hold a reflector there
- Adjust distance to control brightness
Beginner Tip
Closer reflector = brighter fill
Farther reflector = softer fill
This is one of the cheapest and most effective tricks.
3. Lantern Softbox – Soft Light Everywhere
A lantern softbox spreads light in all directions.
Why It Works
It creates a soft, natural feel like daylight inside a room.
No harsh shadows. No sharp edges.
How to Use It
- Hang it above the subject
- Use it for:
- Interviews
- Podcasts
- Indoor scenes
Beginner Tip
Use this when your subject moves a lot. The light stays consistent.
4. Standard Softbox – Your Main (Key) Light
This is the most important light in your setup.
Why It Works
It creates soft, flattering light on the face. It reduces harsh shadows and improves skin tone.
How to Use It
- Place it at a 45-degree angle from the subject
- Slightly above eye level
- Tilt it down towards the face
What You’ll Notice
- Natural shadows on one side
- Better facial structure
- Catchlight in eyes (small sparkle)
Beginner Tip
Do not place it directly in front. Side lighting creates depth.
5. Honeycomb Softbox – Controlled and Cinematic
This softbox comes with a grid that controls light direction.
Why It Works
It prevents light from spreading everywhere.
This allows:
- Bright subject
- Dark background
Which creates a dramatic look.
How to Use It
- Focus the light only on the subject
- Keep the background unlit
- Ideal for:
- Interviews
- Documentary style
- Emotional scenes
Beginner Tip
This is perfect for creating a “premium” look.
Common Lighting Mistakes (And How to Fix Them)
| The Mistake | Why it Happens | The Easy Fix |
| Hotspots | Light is too close or too bright. | Move the light back or use a diffuser sheet. |
| Flat Face | Light is coming from the same direction as the camera. | Move your light to the side (45-degree angle). |
| Spill | Light is hitting the walls and ruining the mood. | Use a Honeycomb Grid or a “flag” (black cloth) to block it. |
| Raccoon Eyes | Light is directly overhead. | Lower the light so it reaches the eyes. |
Basic Lighting Setup for Beginners (Step-by-Step)
Here is a simple setup you can try today.
Step 1: Turn Off Room Lights
House lights:
- Create mixed colors
- Add unwanted shadows
- Reduce control
Always start with a dark or controlled room.
Step 2: Set Your Key Light
Use a softbox:
- Place at 45 degrees
- Slightly above eye level
This becomes your main light source.
Step 3: Add a Reflector
Place it on the opposite side:
- Softens shadows
- Keeps natural look
Step 4: Light the Background
Use an RGB light:
- Add color
- Create depth
Step 5: Adjust and Observe
Move lights slowly and observe:
- Face shape
- Shadow intensity
- Background brightness
Lighting is about small adjustments.
Common Mistakes Beginners Should Avoid
1. Using Too Many Lights
Using many lights does not mean your video will look good. If lights are used without proper placement, the video can look too bright, flat, and unnatural.
2. Lighting Everything Equally
Creates flat images.Always allow shadows.
3. Ignoring Background
Even if your subject looks great, a messy or dull background can reduce the overall quality of the video. People don’t just look at the subject, they see the whole frame.
4. Placing Light Too Close to Camera
This removes depth. Move lights to the side.
5. Not Controlling Natural Light
Sunlight changes constantly. Use curtains or shoot in controlled environments.
Pro Tips to Instantly Improve Your Videos
The “Two-Finger Rule”
Keep slight shadows on one side of the face.
This defines:
- Jawline
- Nose
- Cheekbones
Use Distance to Control Light
Closer light:
- Brighter
- Softer
Farther light:
- Dimmer
- Harder
Watch Your Subject, Not the Light
Always look at how the subject appears on screen. That is what matters.
Why Learning Lighting Matters More Than Gear
Many beginners waste money on:
- Expensive cameras
- Lenses
- Accessories
But ignore the lighting. Even a basic camera with good lighting can look professional.
But a high-end camera with bad lighting will still look average. Lighting is the foundation of visual storytelling.
Practice Ideas for Beginners
Try these exercises:
1. One Light Challenge
Use only one light and create depth.
2. Window Light Practice
Use sunlight from a window and add a reflector.
3. Color Experiment
Use RGB lights with different colors and observe mood changes.
How Consistent Practice Builds Skill
Lighting is not something you master in one day.
But every time you:
- Adjust a light
- Observe a shadow
- Change a position
You learn something new.
Within a few weeks, you will start seeing:
- Better composition
- More professional visuals
- Faster setup time
Why Tiju’s Media School is the Right Choice for You
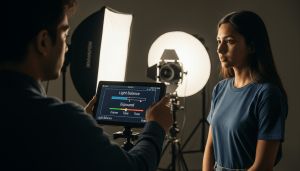
You can watch a thousand YouTube videos, but nothing beats holding the gear yourself. At Tiju’s Media School, we believe that cinematography is a craft, not just a theory.
- Hands-on Hardware: You won’t just hear about softboxes; you’ll set them up, break them down, and see the results on a professional monitor.
- Human Mentors: Our instructors are working professionals who give you “real-world” feedback not just grades.
- A Creative Community: Surround yourself with people who love storytelling as much as you do.
Conclusion
Lighting isn’t about how much money you spend on gear. It’s about understanding how light and shadow work together to tell a story. When you stop trying to “brighten” the room and start trying to “shape” the mood, your work will instantly look more professional.
Ready to take your skills to the next level?
Join now